AI agents take care of monotonous, repetitive tasks, allowing us to focus on things that are truly important. These tools are able to understand natural language, learn from data, and perform actions on our behalf.
There are multiple use cases for AI agents: automating workflows, improving customer service, or even creating personalized virtual assistants.
Building an AI agent isn’t exactly a cakewalk, especially if you’re not tech-savvy and lack technical knowledge… The process often involves dealing with complex frameworks, training models, and many other technical hurdles.
But here’s the thing—this doesn’t have to be as hard as it seems.
You’re likely asking yourself, ‘So, what’s the easier path?’
We’ll show you in a second. But before we get to the easy part, let’s look at how AI agents are usually built.
The Traditional Way of Building an AI Agent
Here’s what the typical process looks like:
Choosing the Right Tools and Libraries:
- Workflow Management: You need tools to design and manage the AI agent’s workflow. This involves setting up a series of nodes representing different actions or decisions, such as data ingestion, processing, and output.
- Data Storage: You need to select a vector database for efficient storage and retrieval. This is essential for tasks that involve searching through large datasets or handling vector representations of data.
- Additional Libraries: Depending on the agent’s purpose, you may need additional tools or libraries, such as TensorFlow or PyTorch for machine learning or spaCy for natural language processing.
Setting Up the Development Environment:
- Provisioning Cloud Resources: Set up a cloud environment on AWS, Azure, GCP or Digital Ocean. This usually involves configuring virtual machines (VMs) or Kubernetes clusters, installing Docker, and managing various configurations. Deploying a Kubernetes cluster on AWS might take several hours, requiring a deep understanding of cloud services and networking.
- Installing and Configuring Dependencies: Install all necessary libraries and dependencies, such as Python packages, database drivers, or custom SDKs. This requires using package managers like pip or npm to resolve compatibility issues.
- Network and Security Configuration: Ensure all components communicate securely by configuring firewalls, VPNs, and secure API gateways. This step is crucial to protect data and manage access controls.
Deploying and Managing the AI Agent:
- Package and Deploy: Package the AI agent and its dependencies into a deployable format (e.g., a Docker container) and deploy it to your cloud platform. This often requires setting up load balancers, managing storage, and configuring serverless functions.
- Monitor and Maintain: Use monitoring tools like Prometheus or Grafana to track the AI agent’s performance, handle scaling, manage updates, and address any security issues.
Challenges and Pain Points:
- Time-Consuming: Setting up environments, integrating tools, and deploying an AI agent can take weeks or months.
- Technically Complex: Requires expertise in multiple domains—cloud services, machine learning, backend development, and more.
- Resource-Intensive: High costs associated with cloud services, storage, compute resources, and developer time.
- Error-Prone: Manual configurations are tedious and often lead to mistakes that require extensive debugging.
Seeing all that might feel overwhelming, but hold on—we promised a shortcut, and it’s coming up.
How Qubinets Simplifies The Process?
Now the easier way…finally 🙂
In our example, we will build an AI agent that can answer questions about how Qubinets works.
Within the building process, in this case, our platform serves as the bridge between Flowise and Qdrant. It provides a unified platform seamlessly integrating both tools by handling all the underlying infrastructure and configuration. Qubinets automates the setup process, from instantiating a cloud environment to syncing Flowise and Qdrant to work together without any manual intervention.
Before we get started, here’s what you’ll need:
- A Qubinets account
- A cloud account on a platform like GCP, AWS, or Azure, along with the necessary access tokens.
- No need for advanced coding skills or manual cloud setup—Qubinets takes care of the heavy lifting.
- Once images are active learn Flowise and Qdrant (no accounts needed)
Now, let’s dive into the step-by-step process of building our AI agent.
Start a New Project
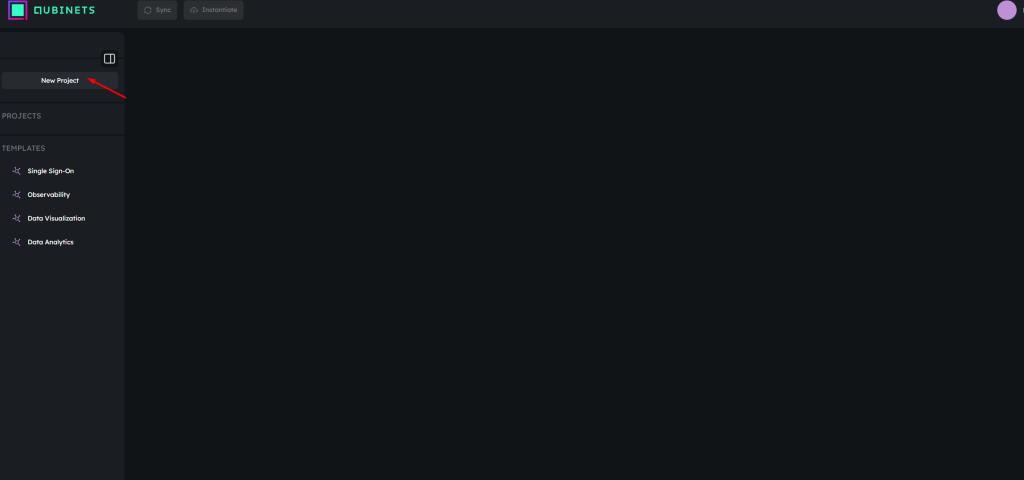
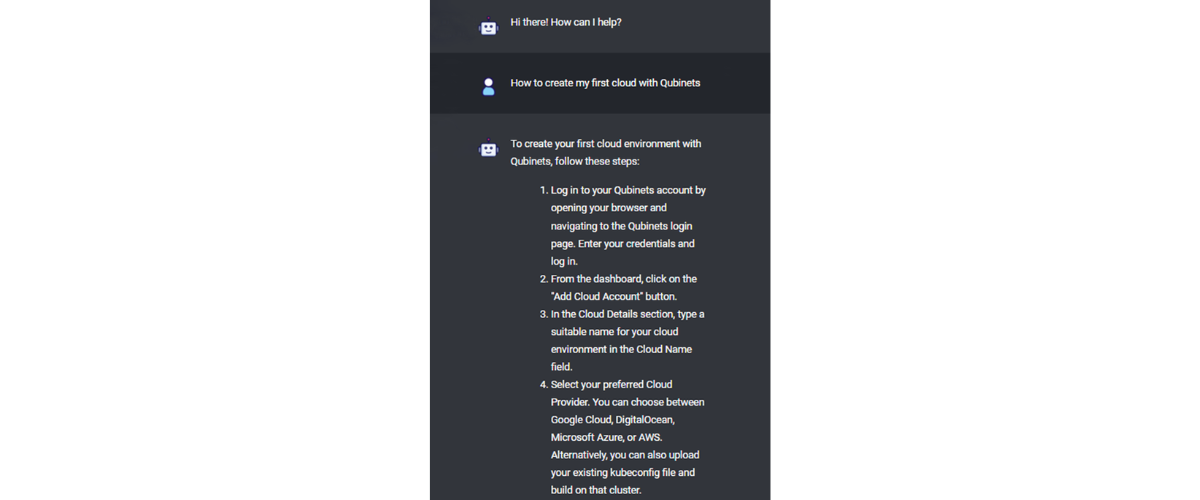
To get started, we first need to create a new project in Qubinets.
- Create a New Project:
- We go to the Qubinets interface and select the option to create a new project.
- We name our project (e.g., “Test ” or any name we choose).
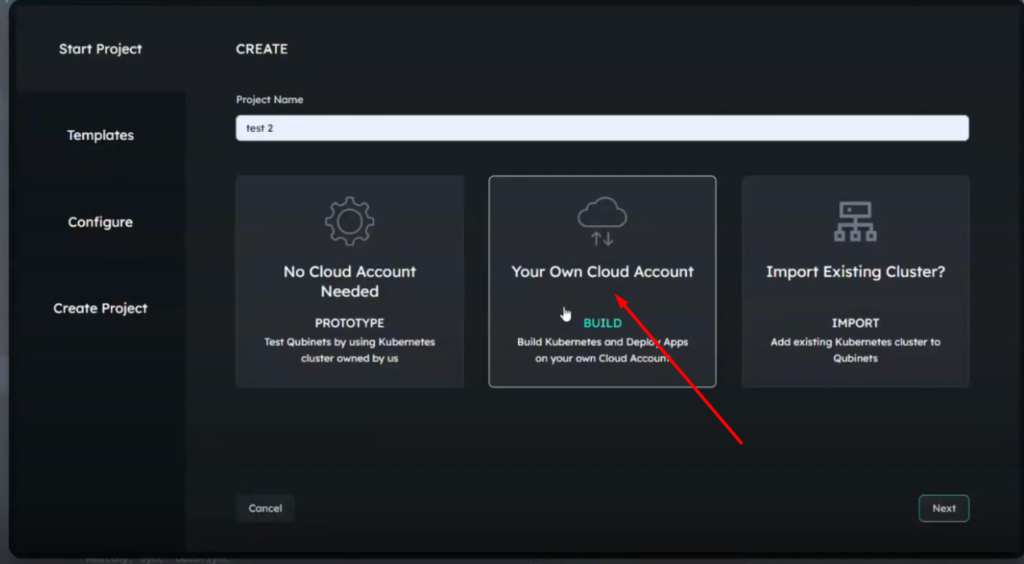
- Choose an Environment Setup:
- Prototype on Cloud: This is a temporary environment that self-destructs after 3.5 hours. It’s ideal for testing and quick experimentation.
- Build on Your Own Cloud: Here, we set up the project on our cloud infrastructure (e.g., Azure, AWS). This involves creating a cloud account and importing the environment to build the infrastructure.
- Import Existing Infrastructure: If we already have a cloud cluster, we can import it (e.g., from DigitalOcean to Qubinets) without starting from scratch.
For this example, we select the “Build on Your Own Cloud” option to have full control over the environment.
Choose Templates and Configure Qubs
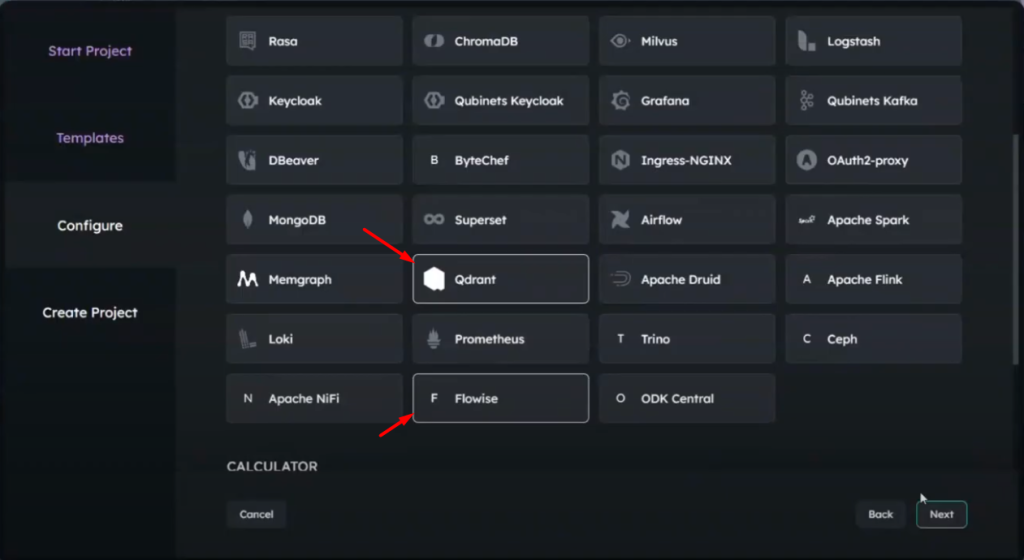
- Select Templates and Qubs:
- After selecting our environment, we have the option to choose from various pre-built templates or pre-configured setups.
- Since we’re not using any of the available templates, we proceed without selecting any.
- Next, we configure the “qubs” (components or modules) we want to add to our cloud. In this case, we select Qdrant and Flowise as the necessary qubs to build our AI agent.
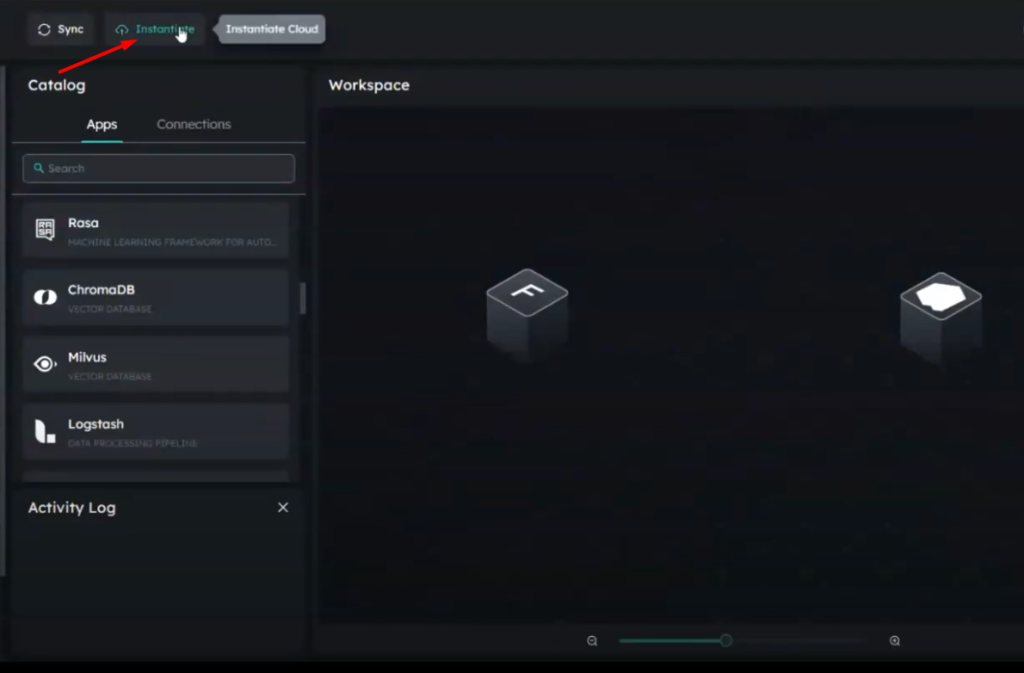
Instantiate the Cloud Environment
- Instantiate the Cloud:
- We use the token or credentials for our chosen cloud provider (e.g., Azure).
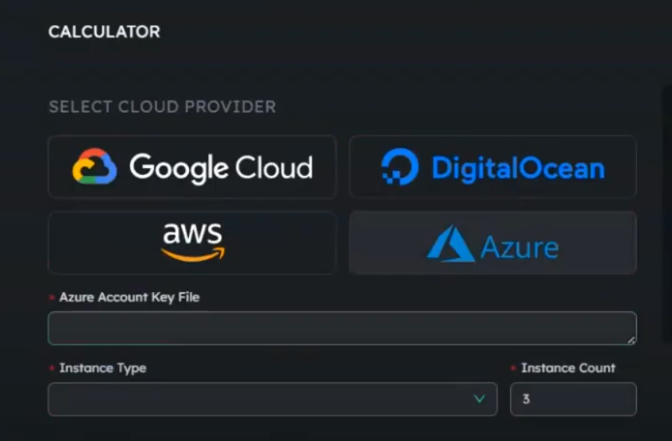
- We start the instantiation process by clicking “Instantiate Cloud.”
- The instantiation process involves multiple steps (around 16-17) and takes approximately 5-7 minutes.
- We monitor the activity log to track the progress of the cloud setup.
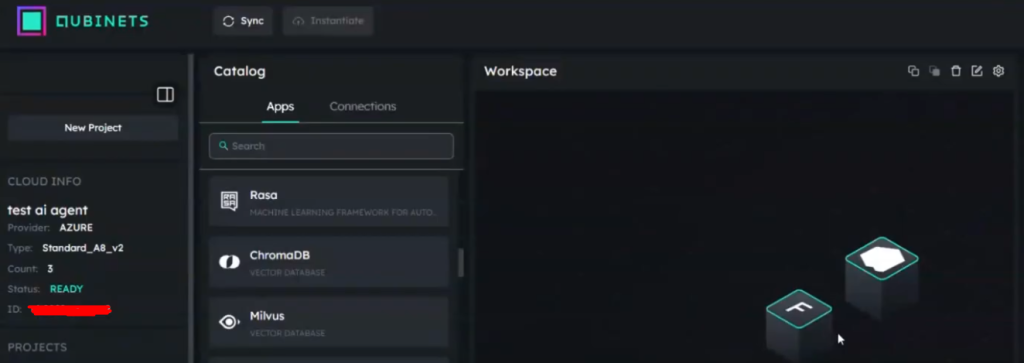
Check the Cloud Status:
- Initially, the cloud will be in an “empty” status.
- During the instantiation process, the status changes to “building.”
- Once the process is complete, the status will change to “ready.”
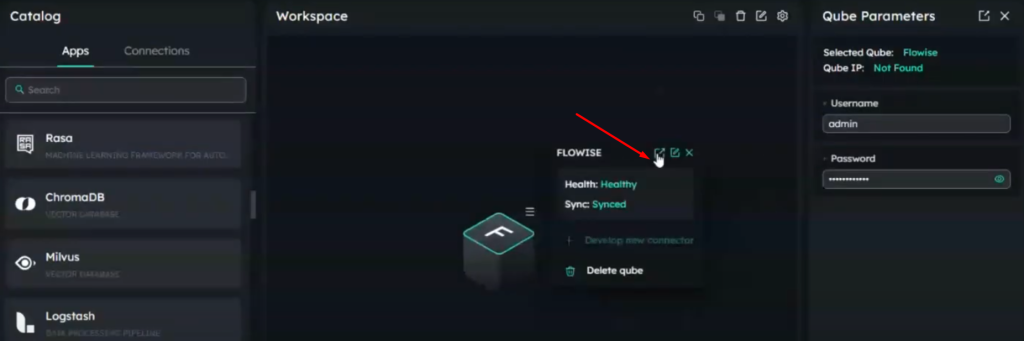
Sync the Qubs to the Cloud
- After the cloud is ready, we sync the selected qubs (Qdrant and Flowise) to the cloud environment.
- The syncing process can take 5-10 minutes, depending on the internet speed and the size of the data.
- Observe the Status Indicators:
- Yellow: Sync in progress.
- Blue: Sync is ongoing.
- Green: Sync is complete.
Set Up FlowiseAI Components
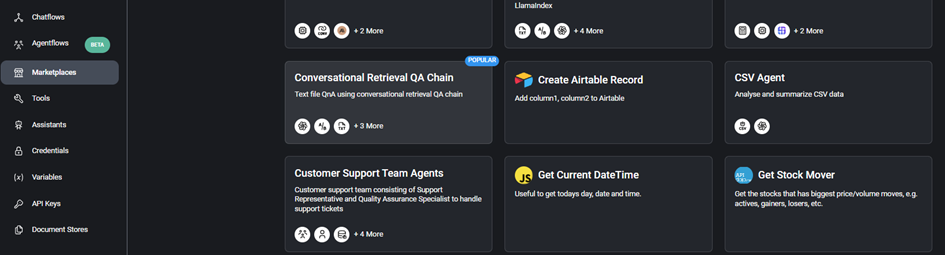
- Open FlowiseAI:
- We access the FlowiseAI interface from within Qubinets.
- On the left side, we’ll see a catalog with various options like chat flows, agent flows, marketplaces, etc.
- We choose to add a new flow using a blank canvas. This allows us to create a custom flow by adding different nodes.
- Add Nodes to the Flowise:
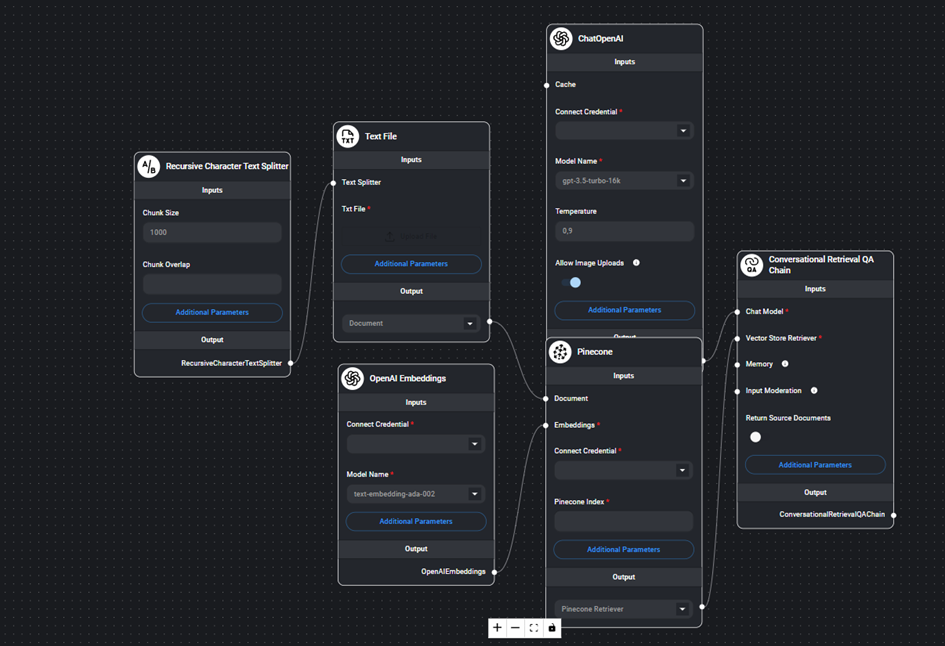
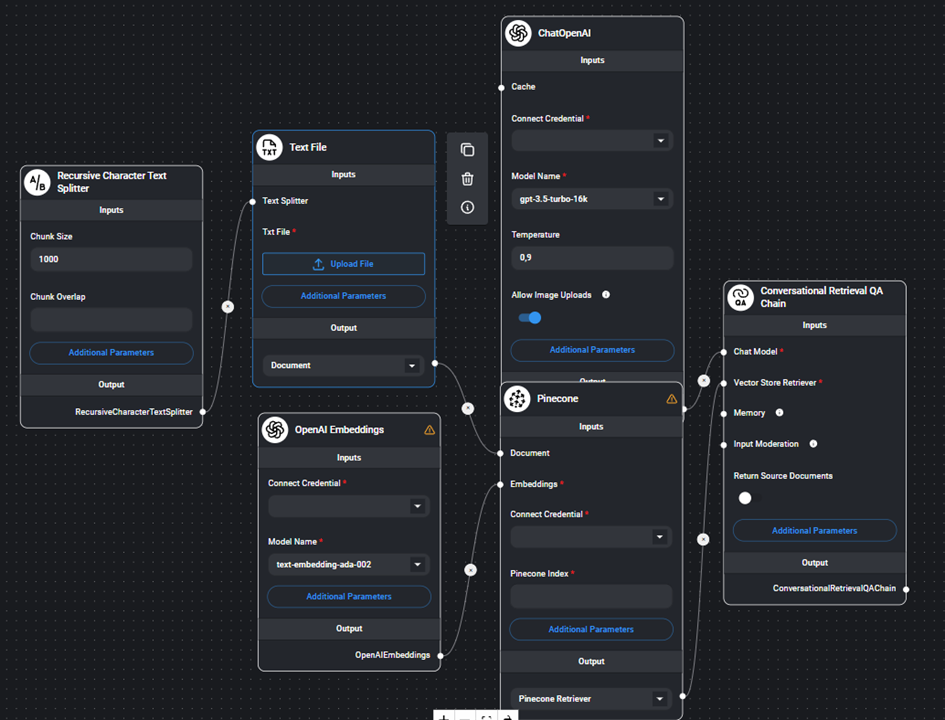
- We use the “Conversational Retrieval QA Chain” node to set up a basic question-answering system.
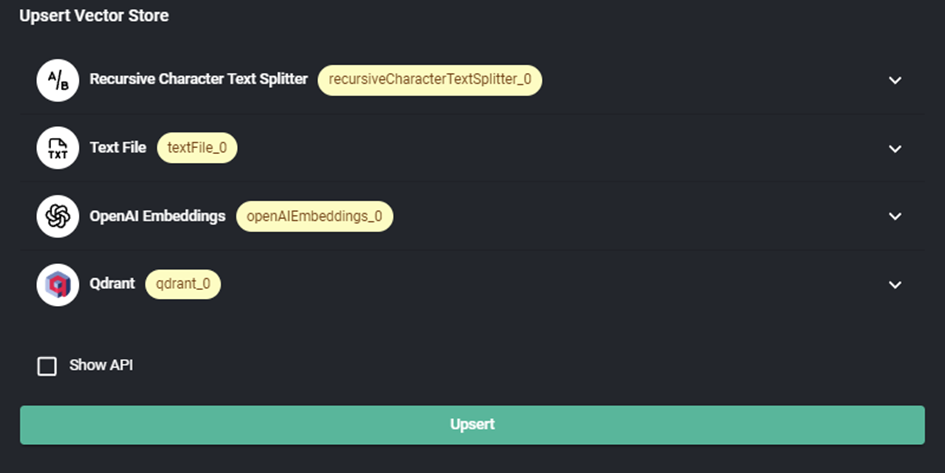
- Add Other Necessary Nodes:
- Text Splitter: We use a “Recursive Character Text Splitter” to divide our text files into smaller chunks, avoiding size limitations during processing. We adjust the chunk size as necessary (e.g., 3000 characters).
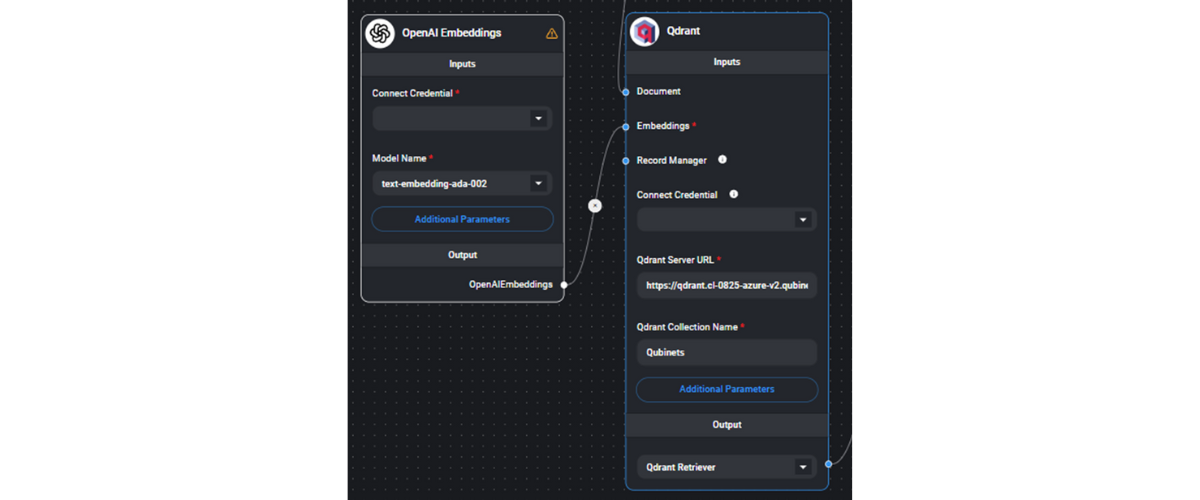
- OpenAI Embeddings: We set up an embedding model (like text-embedding-ada-002) to convert the text chunks into vectors.
- Uploading the text file: In our case, the core of our AI agent is Qubinets tutorial, so we have to upload the data about how Qubinets works.
Connect Flowise to Qdrant
- Set Up the Qdrant Connection:
- We add a node for Qdrant in Flowise.
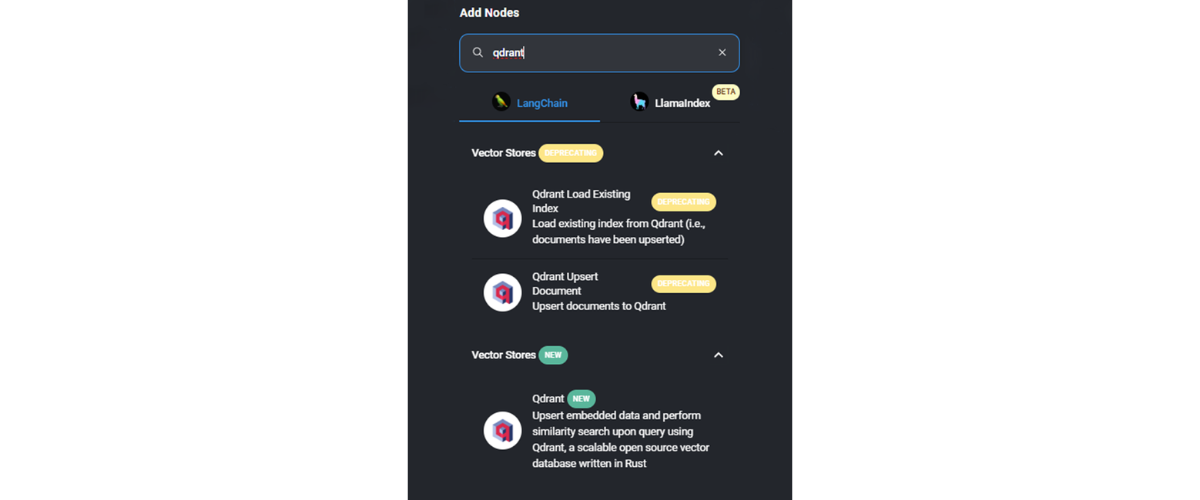
- We connect the outputs from other nodes (like OpenAI embeddings) to the Qdrant node.
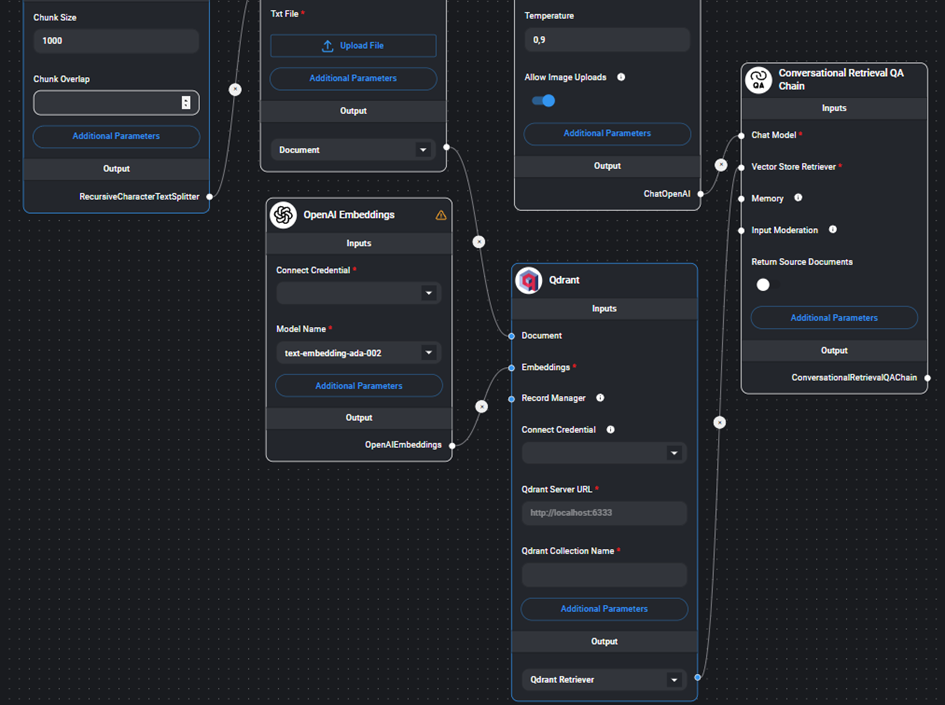
- We remove any unnecessary connections (e.g., Pinecone) because we are going to use to Qdrant.
- We copy the Qdrant server URL up to the “cloud” part (excluding “dashboard” and other extensions) and paste it into the Flowise configuration.
Create and Configure the Qdrant Collection:
-
- We go to the Qdrant console.
- We set up a new collection with a unique name (e.g., “Qubinets”).
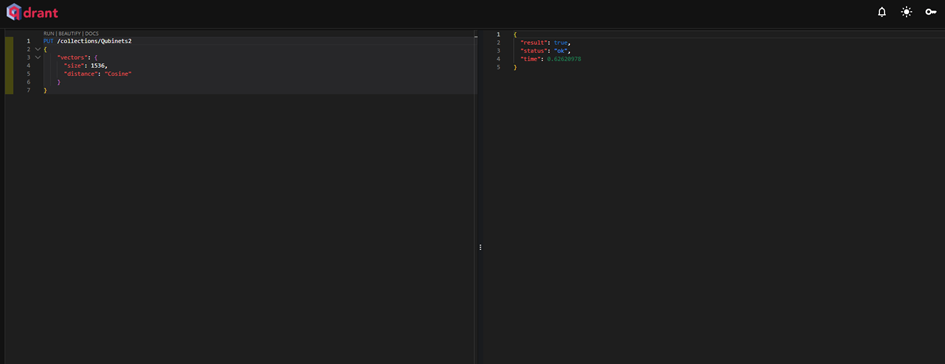
- We ensure that the collection name in Flowise matches the collection name in Qdrant (e.g., “Qubinets”).
Upload Vectors to Qdrant
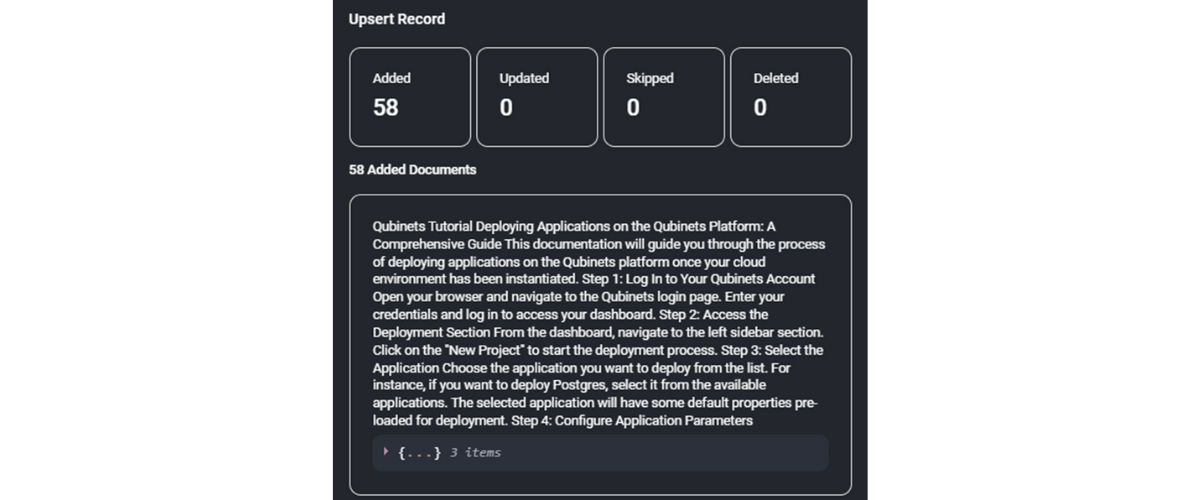
- Upload the Processed Vectors:
- After configuring everything, we initiate the upload process to store the vectors in the Qdrant collection.
- We monitor the activity log to ensure the vectors are uploaded successfully.
Test and Use the AI Agent
- We confirm that the correct number of documents or data points has been added (e.g., 17 documents regarding Qubinets).
- We ensure that the vector databases are properly observed and functioning in the Flowise interface.
Chat with the AI Agent:
- We start using the AI agent to ask questions or perform tasks.
By following these steps, we’ve successfully built an AI agent that can interactively answer any question about using Qubinets, making the development process much simpler and more accessible.
It looks cool, doesn’t it?
Manual Setup vs. Qubinets: What’s the difference?
Okay, so we’ve seen the traditional way of building AI agents. Now, let’s take a closer look and see how it stacks up against doing it the Qubinets way.
Setting Up the Environment:
Manual Setup: You’d start by configuring a cloud environment—setting up servers, networking, storage, and all that good stuff. It could take days, and you’d need to know your way around platforms like AWS or Azure.
With Qubinets: Qubinets cuts out the heavy lifting. You pick a pre-configured environment—either on Qubinets Cloud for quick tests or your existing cloud setup. No fussing with backend configurations; the setup takes just a few minutes.
Selecting and Configuring Tools:
Manual Setup: Now, you’d need to manually install tools like Flowise for workflow management and Qdrant for data storage. This means downloading, setting up secure connections, and hoping everything plays nice together.
With Qubinets: In Qubinets, you just choose the tools (qubs) you need from a catalog. Tools like Flowise and Qdrant are ready to go with one click—connections are auto-configured, and all dependencies are managed for you.
Deploying the AI Agent:
Manual Setup: Deployment means packaging everything up, setting up containers, and configuring servers and services. It can be a real headache and take weeks if you hit snags.
With Qubinets: Just click “Instantiate Cloud.” Qubinets handles the provisioning, syncing, and deployment. You can watch the progress in real-time, and your AI agent is up and running in minutes.
Scaling and Maintenance:
Manual Setup: If you need to scale up or maintain the system, you’re back in the weeds—adjusting resources, handling updates, and fixing any security issues.
With Qubinets: Qubinets takes care of scaling and maintenance behind the scenes. Resources are allocated automatically, updates are managed, and you get detailed analytics without any extra effort.
Integration with Other Tools:
Manual Setup: Want to connect your AI agent to a CRM or another platform? Get ready to write custom code, configure APIs, and manage lots of authentication details.
With Qubinets: Qubinets offers built-in integrations that make connecting to other tools a breeze. It’s all done through the interface—no coding required.
Monitoring and Analytics:
Manual Setup: You’d have to set up monitoring tools, configure them, and manually track performance data to understand how your agent is doing.
With Qubinets: Qubinets has monitoring and analytics built-in. You can see how your AI agent is performing at a glance, helping you make quick adjustments and improvements.
Conclusion
AI agents are no longer the sole domain of tech experts. With Qubinets, you’ve got a powerful yet user-friendly platform at your fingertips. The templates and intuitive interface make creating your own AI agents a breeze.
Jump in, feel free to experiment with the templates, and see what you can create. The process is straightforward, and the results can be truly rewarding.
We’re ready when you are – so why not start building today? You can start anytime and for free. Just sign up for an account and start playing with the tools.