In our increasingly digital world, we find ourselves juggling countless online services, each requiring its own set of credentials. This process can be frustrating and, more importantly, a security risk. However, there’s a solution to this problem: Single Sign-On (SSO).
How We Usually Sign In to Services
Think about your daily digital routine – from email and social media to work applications and online shopping. Typically, you’d visit each service’s login page and enter your unique username and password. This traditional authentication approach results in numerous sets of login credentials to remember, creating complexity and security vulnerabilities.
What Is Single Sign-On (SSO)?
Single Sign-On (SSO) is a game-changer in the authentication landscape. It’s a process that allows users to access multiple services or applications with a single set of login credentials. In other words, once you’re authenticated into one application, you gain seamless access to other linked services without re-entering your credentials. This not only simplifies the user experience but also centralises the management of authentication, improving security and reducing password-related risks.
What Is Keycloak?
Keycloak is an open-source Identity and Access Management (IAM) solution developed by Red Hat. It’s a robust tool that offers a customisable SSO solution supporting various authentication protocols, including OAuth, OpenID Connect, and SAML. Keycloak brings capabilities such as user management, identity brokering, fine-grained access control, and secure token handling to the table.
What Is OAuth?
OAuth (Open Authorisation) is an industry-standard framework for secure API access. It enables applications to access user data on another server without exposing the user’s credentials. OAuth establishes roles for different entities, such as the Resource Owner (user), Authorisation Server, and Client Application. It relies on tokens, like access tokens and refresh tokens, to grant and manage access, enhancing security and user privacy.

Deploying Single Sign-On with Keycloak and OAuth on Google Cloud
Now, let’s guide you through deploying an SSO service using Keycloak and OAuth on Google Cloud:
1. Set Up a Google Cloud Project: Begin by creating a Google Cloud project if you haven’t already. Configure billing and enable necessary APIs like Compute Engine and Kubernetes Engine.
2. Provision a Kubernetes Cluster: Utilise Google Kubernetes Engine (GKE) to create a Kubernetes cluster to host your Keycloak instance. Kubernetes offers scalability and simplified container management.
3. Deploy Keycloak: Containerise your Keycloak application and deploy it to your GKE cluster. Docker is a handy tool for containerisation, and Kubernetes manifests can help with deployment. Configure Keycloak according to your needs, including realm settings, client applications, and identity providers.
4. Secure Keycloak with HTTPS: Prioritise security by using Google Cloud’s managed SSL certificates or Let’s Encrypt to secure your Keycloak instance with HTTPS, ensuring that data transmission remains encrypted.
5. Implement OAuth for SSO: Configure Keycloak as an OAuth 2.0 Authorisation Server. Define clients representing your applications and set up identity providers, such as Google, to enable users to log in using their existing accounts.
6. Protect Your Applications: Secure your applications by integrating them with Keycloak, implementing OAuth 2.0 authentication flows. Typically, this involves using OAuth libraries for your chosen programming language or framework to manage user authentication.
7. User Management and Access Control: Take advantage of Keycloak’s user management features to handle user provisioning, assign roles, and implement fine-grained access control. Establish permissions and policies to safeguard your applications.
The time required for deploying an SSO service with Keycloak and OAuth on Google Cloud can vary depending on your familiarity with these technologies and the complexity of your application ecosystem. A rough estimate for setting up a basic SSO service could be anywhere from a few hours to several days. This timeframe includes initial setup, configuration, testing, and optimisation.
Deploying SSO with Keycloak and OAuth on DigitalOcean
The process of deploying an SSO service using Keycloak and OAuth on DigitalOcean is in its essence pretty similar to the one described above, but let’s go through it:
1. Set Up a DigitalOcean Droplet: Start by creating a DigitalOcean Droplet to host your Keycloak instance. Choose an appropriate plan based on your expected resource requirements and configure the Droplet with your preferred operating system.
2. SSH Access and Firewall Rules: Configure SSH access to the Droplet and set up firewall rules to ensure secure access. It’s essential to open ports for HTTP, HTTPS, and any other necessary services.
3. Install and Configure Keycloak: Install Keycloak on your Droplet, and follow the provided documentation to configure it according to your specific requirements. Set up realms, clients, and identity providers as needed.
4. Secure Keycloak with HTTPS: Implement SSL/TLS encryption for Keycloak by obtaining and configuring SSL certificates. This ensures secure data transmission.
5. Implement OAuth for SSO: Configure Keycloak as an OAuth 2.0 Authorisation Server. Define clients representing your applications and set up identity providers to enable users to log in using existing accounts.
6. Protect Your Applications: Secure your applications by integrating them with Keycloak, implementing OAuth 2.0 authentication flows. Utilise OAuth libraries for your chosen programming language or framework to manage user authentication.
7. User Management and Access Control: Leverage Keycloak’s user management features for user provisioning, role assignment, and fine-grained access control. Establish permissions and policies to safeguard your applications.
Deploying SSO with Keycloak and OAuth Using Qubinets
Now, we will deploy the same solution and on the same cloud provider, Google Cloud, using Qubinets:
1. Set Up a Qubinets Project: Log in to your Qubinets account and select Add Cloud functionality. Add a name, select Google Cloud as provider, add GCP Service Account Key File and select instance type from the selection list. These attributes are later used to deploy your solution onto Google Cloud.
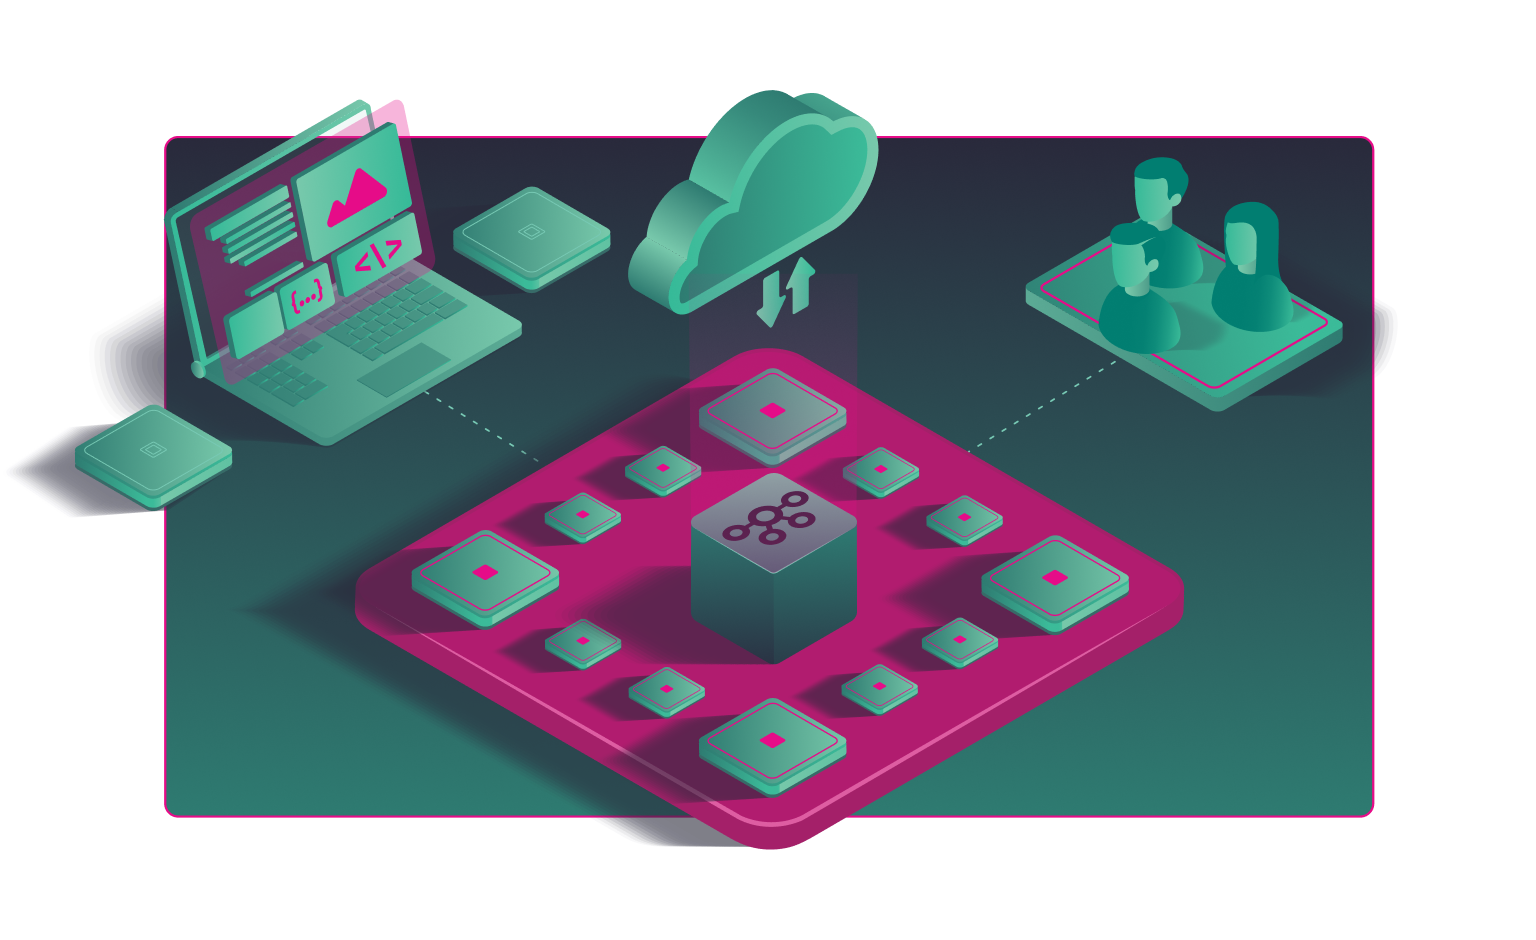
2. Instantiate Cloud: In order to have a prepared cloud to which we will deploy our solution we will start with cloud creation. You can do this by clicking Instantiate Cloud button and this will start automatic cloud creation on Google Cloud in the background. There are around 20 steps needed to finalise your cloud and all of them are done for you by Qubinets platform. You can continue working on your solution while Qubinets is preparing the cloud for you and you can see the progress in the Details window. Usually, this step will take around 15 minutes.
3. Create a Workspace for Your Solution: A workspace is a canvas on which you create your final solution in Qubinets, give it a name and start creating.
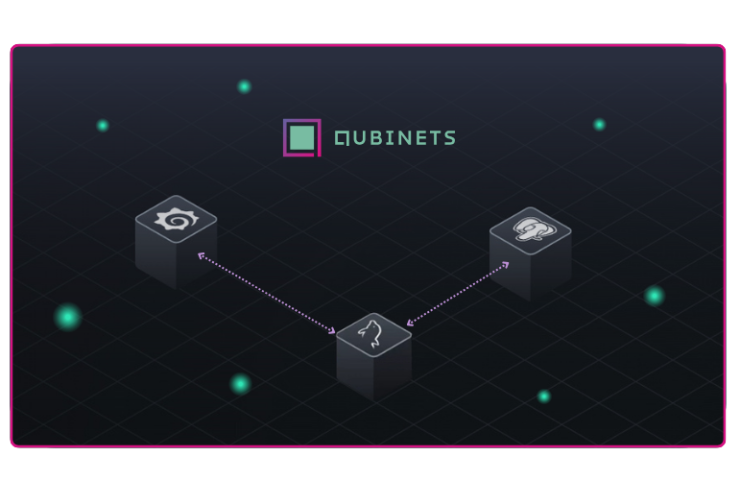
4. Add Applications to Workspace: Once the Workspace is created, you will see a list of open-source applications available for use in Qubinets. Out of this list, add Keycloak and OAuth 2.0 onto the canvas.
5. Configure Applications: Click Keycloak app and add a username and password for the Admin user. Click on OAuth and from the Connect to list select Keycloak and add the connection between the applications.
6. Deploy Solution: In order to deploy the solution, we first need to make sure that the cloud has finished instantiating. Once instantiated, you can click on the Sync Qubes button which will start with the deployment of the apps on the prepared cloud.
7. User Management and Access Control: This step is the same as in the manual deployment example. Your solution has been deployed, the connection between the applications is established, the applications themselves are deployed and secured with HTTPS on a Kubernetes Cluster deployed for you by Qubinets.
Using Qubinets to build out and deploy this solution required only around 20 minutes and the solution deployed has already been tested and optimised and ready for your immediate use.
*The process of deploying the solution on DigitalOcean using Qubinets is the same as described above, the only difference is picking DigitalOcean from as Cloud Provider when setting up Qubinets project (step 1).
Conclusion
Deploying Single Sign-On with Keycloak and OAuth on Google Cloud or DigitalOcean is a powerful approach to streamline authentication and enhance security. By centralising authentication, you provide a seamless and secure user experience while simplifying access management. As businesses expand their digital presence, implementing SSO becomes pivotal in ensuring both user satisfaction and data protection.
Manually setting up and configuring this infrastructure can be time-consuming and the user needs to know how to install and set up multiple different systems. Qubinets offers a faster path to implementation, streamlining the process and accelerating time-to-value, allowing organisations to focus on delivering superior user experiences while ensuring robust authentication and access control.